Running DeepSeek-R1 on refubrished blade server: 04 Cooling + Upgrades
Welcome back, Previous part here: Running DeepSeek-R1 on refubrished blade server: 03 Power+.
This part was written back in August of 2025, but only published in January of 2026 because life got in the way.
What I was planning to do:
- figure out cooling
- buy more RAM (not happening, because 512 Gb is already enough to cover my tasks)
Haha, with current ram prices, I should have definitely bought more
- (optionally) update CPU from Haswell to Broadwell
- update PCB to make everything more tidy So that is basically, what I will go over.
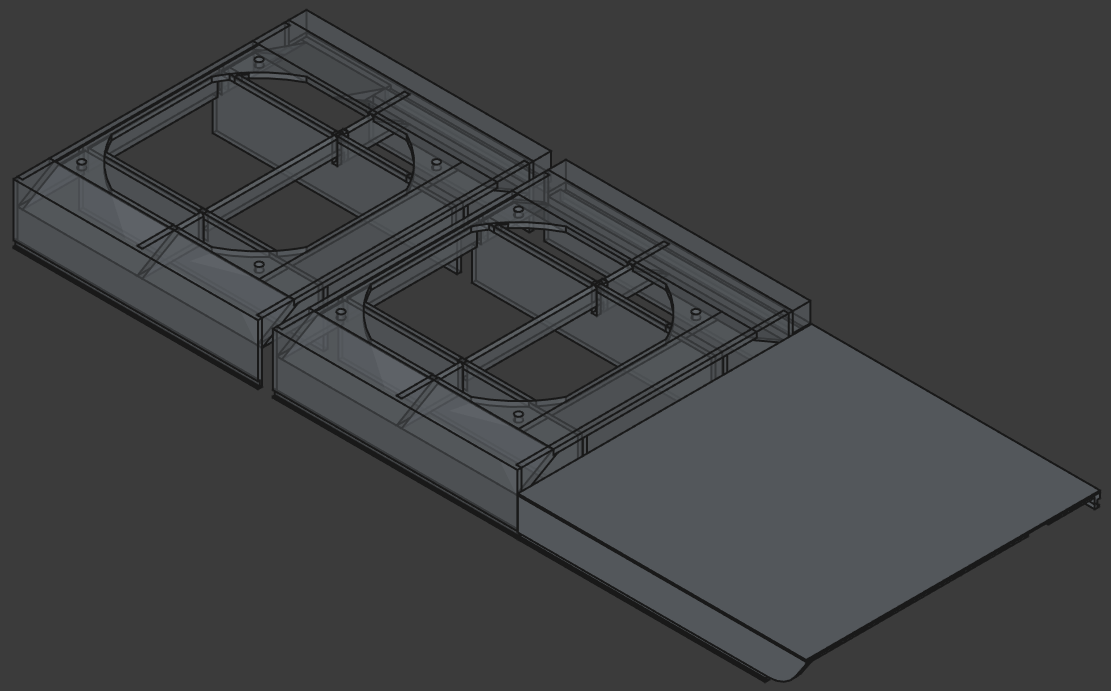
Cooling
In the interest of trying to make everything smaller (and not too loud), I've decided to try cross-flow cooling. Long story short, it performed poorly. I saw a lot of thermal throttling (CPU constantly hitting 95 °C under light loads), because airflow wasn't as powerful as I hoped for. I decided on trading a bit of space (basically making it 1.5U) to use 2x120mm fans mounted on top of each CPU (so far idle temps are around 40 °C and 55-60 °C under stress test). The only thing missing is to do get airflow to cool the RAM. Which is easily solved with 3d printed air guides.
CPU Upgrade
While I stated that this would be optional, this actually became an issue.
I bought Samsung's DDR4 64GB-2666 memory, but with the CPU that came with the motherboard, I was stuck with 1866 MT/s. Also, energy efficiency could be a bit better with switching to Xeon E5 2600 v4 lineup.

Image was created by servethehome.com for their review of e5 v4 lineup https://www.servethehome.com/intel-xeon-e5-2600-v4-broadwell-ep-launched/
By filtering CPUs with DDR4 freq == 2400 MT/s, and comparing current prices, I've landed on E5-2650v4, it's currently available for <$10 per CPU, TDP is pretty low (so will be easily cooled), and provides cores'o'plenty.
By having 2400 MT/s RAM vs 1866 MT/s, I should see noticeable improvement in RAM throughput 19.2 vs 14.9 GB/s per stick, so around +30% t/s.
There are some other benefits of switching to Broadwell generation, including:
- Lower latency of FMA, 5->3 cycles
- Cores that do AVX instructions no longer cause other cores to drop frequency
Power Upgrade
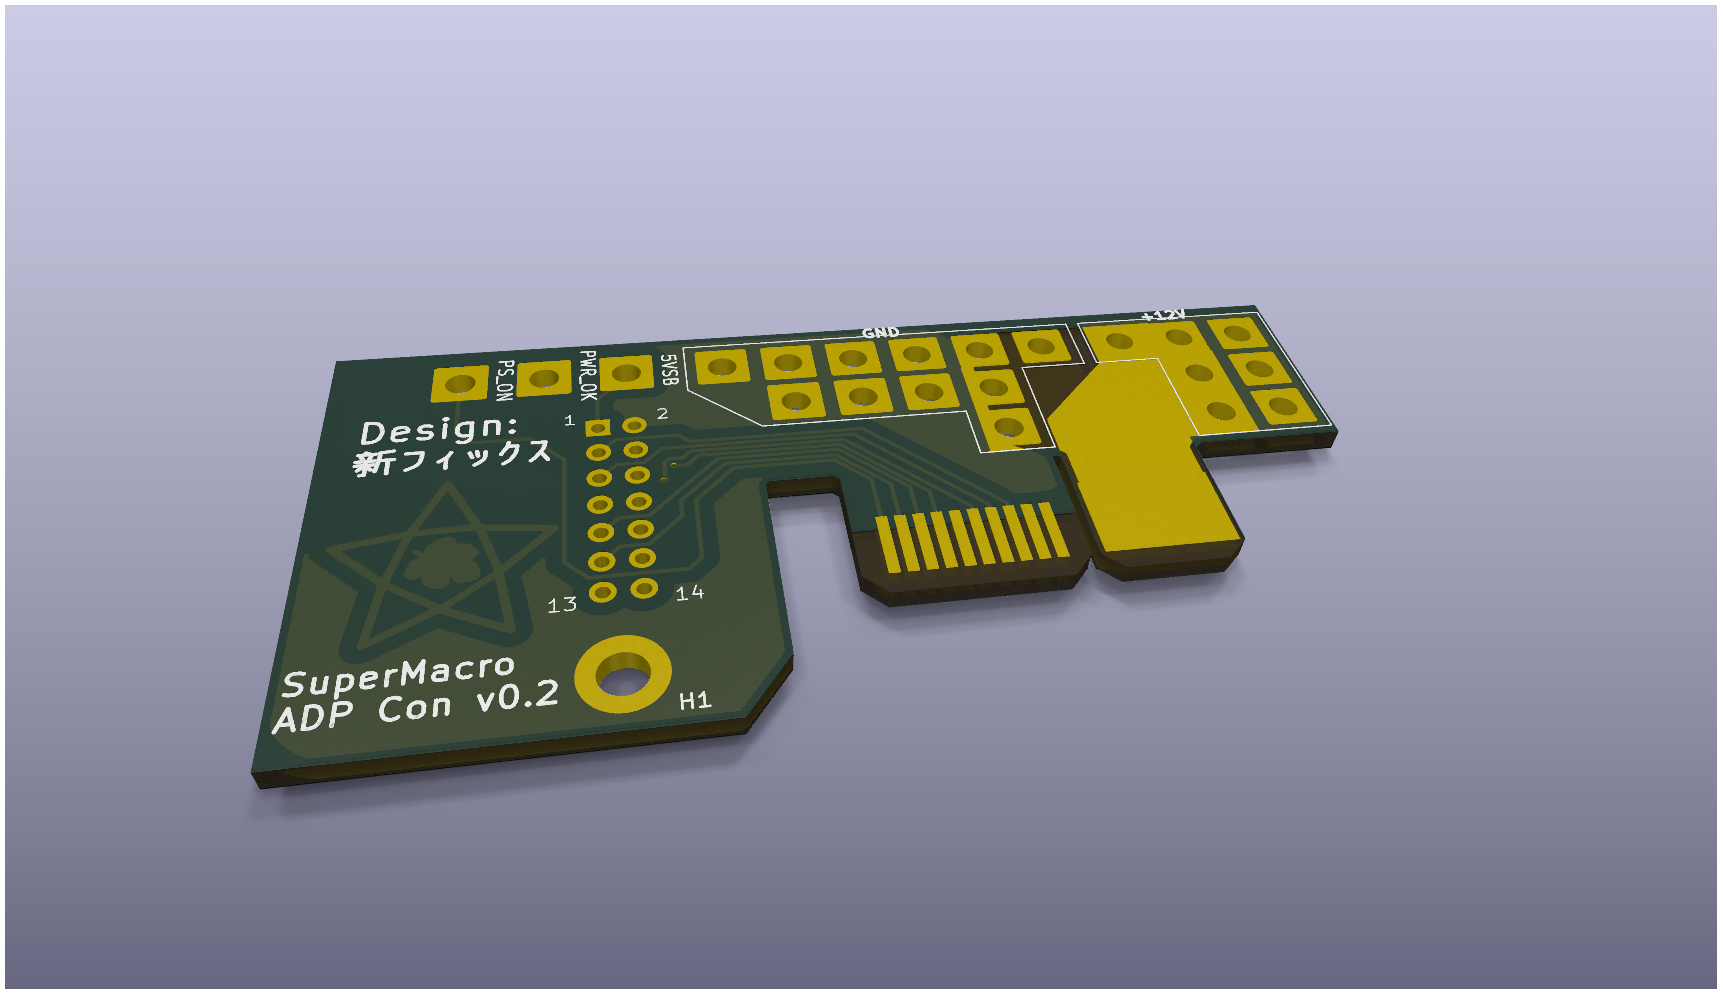
As I mentioned in previous part, original PCB was huge overkill, and since no communication is happening between motherboard and PSU, it could be simplified to be logic-less PCB.
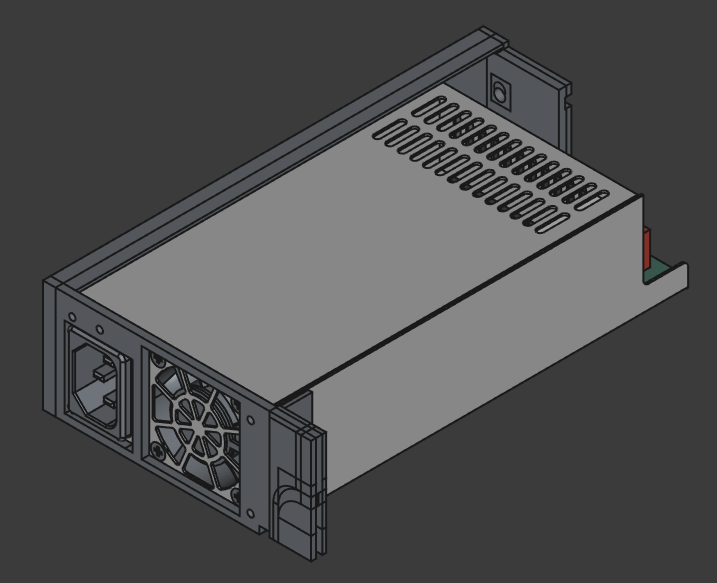
I also wanted everything self-contained in the blade, so I switched PSUs and simplified the board to just power distribution.
For the new PSU, I bought a crappy(-ish) Apevia ITX-PFC500W. Apevia’s reputation is… bad, but even at peak load I should stay under 50% of its rated 12 V output, so my apartment should be safe(-ish).
Internet will say that you can make 1U PSUs silent by plugging in noctua fans. I am highly advising not to do it. Most non stock 40mm fans lack proper static pressure to allow cooling in 1U scenarios.
PSU connectors looked weird, and I assumed all connectors probably are not part of any standard. So I just mapped it by cross referencing the 24 pin/6pin/4pin/IDE part of them.
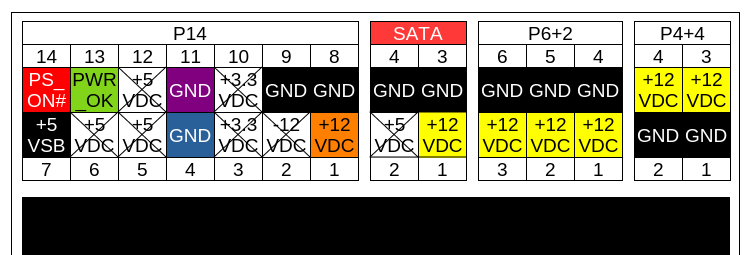
In total I have:
- 7x +12V pins
- 11x GND pins
- 1x +5VSB
- 1x PWR_OK
- 1x PS_ON
Cabling is 18AWG, so maximum for 12V will be ~7.0 A/pin.
In total limits are:
By cabling - 18AWG, 7.0 A/wire, lands at 49A total (588 W)
By ATX - trying to be on safe side, recommends of 150W per 8 pin PCIe connector (only 3 wires are for current), so 50W per connector pin, and lands around 350W.
By PSU - up to 33A (396W).
Based on observed real world power consumption, I wont be pushing more than 200W. So, once again I would call it safe(-ish).
PCB Upgrade
New PCB, being updated version, simplifies a lot of stuff, and fixes past mistakes, notably:
- removed dc-dc converter
- removed esp32
- removed all smd components
- smaller size
- fixed hole position
You can't just short PS_ON to ground, since motherboard doesn't use ATX standard of PS_ON and PWR_OK, and toggles PS_ON# right after PWR_OK is high (see pics). 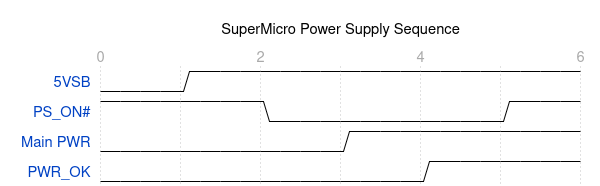
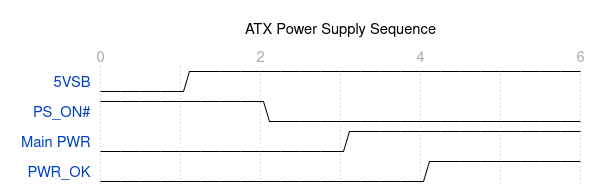 And board controller actually checks if PS_ON# is high again, otherwise it aborts the boot process and turns VRM off, even if PWR_OK is high and +12V is available.
Simplest solution that I was able to find soldering PS_ON to ground near the connector and never actually connecting it to the motherboard or adapter PCB. The only downside of this process - to reboot server, you actually need to plug and unplug it from mains. (Which is solved with $5 wifi smart plug)
Basically, that means soft reboot is basically not an option here (without some trickery licke reboot actually sending commands to smart plug)
Making it organized
As I mentioned, I've designed and 3d printed CPU shrouds that snap-fit to metal frame of the server.
To hold PSU as part of blade, I also made simple 3d printed cage.
And with everything mounted it looks like this: 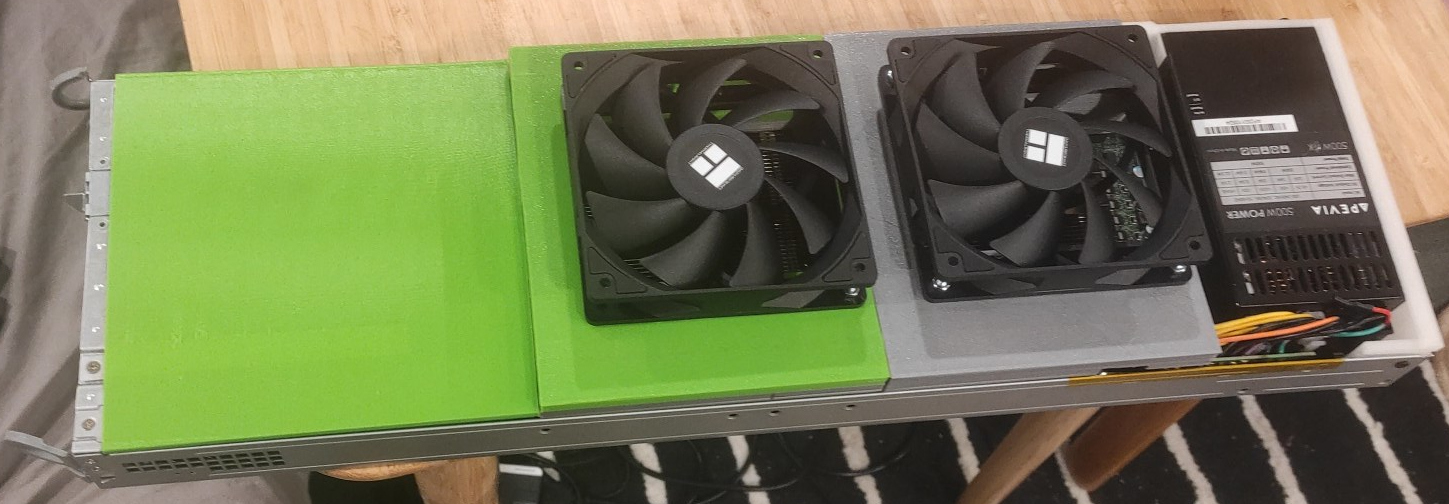
In next part I am planning to cover how I am using it, how much t/sec I get, etc.
Thanks for reading, and until next time.
Next part: insert here when avaliable.
AI was used to grammar-check this post and generate alts for the images.
